I think it is hilarious that we use all the fall vegetables as an excuse to make desert. I mean, I follow other blogs who are making pumpkin chili and butternut squash risotto, and they sound delicious, they really do... but only (dedicated) bloggers are that motivated. All the rest of us are like "I'll make 8 batches of pumpkin cookies and eat them all because they are practically a health food..."
Because, you know, 1 cup of pumpkin between 3 dozen cookies makes them healthy...
Well, we can't make cookies for no reason because we are all trying to eat healthier, and if we make cookies, then we will eat them (maybe all of them in one night, but who's counting?).
Oh, but if there is a pumpkin on the counter... now we can not only make one batch of cookies, but we can make 3 more and freeze them for later! (If it's a big pumpkin we can also make pumpkin cupcakes, pumpkin coffee cake and a pumpkin spice white Russian...)
Actually, for me, all cookies are really just a chocolate chip delivery device. Eating them out of the bag is just so... so... so much like my mother! But I can't complain, I am also passing along the love of chocolate chips to my kiddos... my nearly three year old will "help me" make cookies by eating the chocolate chips out of the dough. That's why I have to add an extra cup of chocolate chips... I swear!
Note from the author: if some one was going to make cookies for say, a party, and decided to put pumpkin in them, now that would actually be more like a hidden vegetable, and everyone would be healthier for it. What I am describing in this blog is actually the opposite.
Here is the recipe adapted from two peas & their pod:
Ingredients:
3 cups whole wheat flour
3/4 teaspoon salt
1/2 teaspoon baking soda
1/2 teaspoon baking powder
1 teaspoon cinnamon
1/2 teaspoon nutmeg
1/2 teaspoon ginger
1/2 teaspoon cloves
1 cup butter, room temp
1 cup brown sugar
3/4 cup maple syrup, room temp
1 large egg, room temp
2 teaspoons vanilla
1 cup pumpkin puree, room temp
2 cups chocolate chips
Directions:
Preheat oven to 350 and line baking sheet with parchment paper. (I do my large one and freeze the dough balls, so they are ready for future baking, and my small one for baking 6 or so right then. Best thing I have ever done... regarding cookies, anyway!)
Whisk flour, salt, baking soda, baking powder, and spices. Set aside.
Cream butter and sugar. Add egg, vanilla, pumpkin, and maple syrup. (If it's cold, it wont mix together well, but no worries, it all works out in the end!)
Stir in flour mixture until just combined.
Stir in chocolate chips.
Bake for 10 mins, cool on baking sheet for a few minutes.
The research team actually likes these better the next day, but they don't usually last that long!
Happy Pumpkin season!
Friday, November 1, 2013

Thursday, October 10, 2013
Zucchini Chocolate Chip Cookies
Zucchini!
We got a few of those HUGE zucchini's from one of my research team's coworkers... you know, the size that puts my biggest cutting board to shame? I have made a bunch of zucchini bread, and also these cookies!
I made the dough and then froze it in balls, so we just pull 6 (or 12) out of the freezer and bake them when we want! It's great!
I got the recipe from Karen over at Kitchen Treaty. I changed some of the ingredients, as I usually do, so I will post what I did and if you are curious, you can check out her blog.
So the zucchini is not visually hidden, see the final result:

But you can't taste it at all. They are so good! We eat way too many... in fact, I am way too full from dinner, but now looking at the picture, I want to go bake some!
Ingredients:
1 cup unsalted butter, softened
1 cup brown sugar
2 eggs
1 cup maple syrup
2 teaspoons vanilla
4 cups whole wheat flour
2 teaspoons baking soda
2 teaspoons ground cinnamon
1 teaspoon salt
2 cups grated zucchini
1½ cups semi-sweet chocolate chips
Directions:
Heat oven to 375 degrees.
Beat together the butter and brown sugar until fluffy. Add eggs one at a time until incorporated, mix in the vanilla, then mix in the maple syrup.
In a medium bowl, mix together flour, baking soda, cinnamon, and salt.
Add the dry ingredients to the wet ingredients until ingredients are just combined.
Add the zucchini and chocolate chips and mix just until incorporated.
Scoop the cookies in approximately 2-tablespoon increments onto cookie sheet.
Bake for 10 – 12 minutes, until the cookies seem set and light golden brown around the edges. (Frozen dough cooks for closer to 20 minutes.)
Enjoy!
Friday, August 23, 2013
Kale chips
I love kale chips.
Or maybe I just love salt. But either way, we sure eat all the kale when I make these! (I have also made them with collard greens, and they were just as good.)
So I followed Karen's recipe from her blog Kitchen Treaty, and I totally agree with everything she said about kale chips. (If you are going to make these, just go to her site and follow her directions, she has a bunch of great pictures too!)
So here's how it goes:
Directions:
Wash the and dry the leaves really well.
Cut the middle out (the rib?) and cut them into 2 inch pieces. This is important. They are so crispy that they need to be bite sized or they just fall apart when you bite into them. (Why yes, I am so lazy that I made big pieces and learned this the hard way. The dog also ate a lot of kale that night!)
Toss with olive oil.
Lay kale in single layer on parchment paper covered cookie sheet(s).
Sprinkle with salt.
Bake for 8-12 minutes, or until just crispy looking. They burn quickly, so watch closely!
Remove from oven, sprinkle with more salt and we also love ours with nutritional yeast.
Devour before next batch is done.
That is my only complaint about these... I can't make them fast enough!
Here are some pictures:


Kale chips with frozen pizza. Because that's how we roll. (Actually, I didn't have enough time to make dinner, but I sure had time to make kale chips!! Bwahahaha.... see? These things are like crack!)
Crack that I serve to my children...


The Verdict:
"Hello. I am the research team, and I am an addict."
I guess being addicted to leafy greens isn't the worst possible thing... ;)
Friday, June 28, 2013
Homemade Pasta
No, no, I haven't made vegetable pasta, but hmmm, maybe I will try!
First things first. I need to become a master of regular non-vegetable infused pasta making!
I made pasta! In the past I would have been way too intimated to try something like this, buuuuut...
I've been hooked on a cooking competition show, MasterChef, and have been inspired by the chefs and the food they make on the show. (Turns out, I am a reality TV junkie. It's pathetic how much I look forward to the next episode of the Bachelorette, and don't get me started on the number of times I have rewatched auditions on So You Think You Can Dance, or the number of dinners we have eaten which were inspired by MasterChef... and those are only the current reality shows...)
One episode, they made pasta. So... guess what we had for dinner... homemade pasta!
(Unfortunately though, tonight we did not have lime meringue pie for dinner... )
I am still so amazed that the pasta was not only edible, but pretty tasty, and shockingly not that hard to make.
I didn't take nearly enough pictures of the process, but here is the link to the blog I followed. She posted lots of pictures!
Ingredients:
Flour (I used whole wheat, and it worked!)
Eggs
2 eggs per cup of flour (this would serve two)
Directions:
Make well in flour.
Crack eggs in well.
Mix by hand with one hand until all combined.
Turn out onto floured surface.
Knead until smooth and no longer tacky.
Roll out as thin as you possibly can.
Slice into thin noodles.... bwhahahah, good luck with that! (when I figure out a secret time-saving trick, I will let you know!)
Add noodles to salted boiling water.
Cook for 2 minutes.
Eat!
Here is a picture:

I served these with a garlic-olive-oil-tomato-green-onion "sauce." Because those were the ingredients we had!
Also, how good am I....
C's first noodles? Homemade. Because I am that good. (Or maybe because I watch too much reality TV?)

After kneading the dough into a ball I sliced it in half and saved the other half for the next night, when we had ravioli!
See?!


This is a spinach and ricotta filling with green onions, salt, pepper, nutmeg, oh, and an egg. Delicious!
(ps. I think that close up picture might be the best picture I've taken for the blog! I am not a great picture-taker, that's for sure. Where's the photography reality TV show when I need it?!)
The judges may have sent me home for this meal (because I used whole wheat maybe, and the presentation is not even close, also, the vegetables are not seasoned at all... actually they are barely cooked... our two year old likes them better frozen... well, yes, I think they would have thrown me out of the kitchen!), but for our little family, it was just fine!
Monday, May 27, 2013
My Birthday Cupcakes
Note from the author (in the voice of the Glee narrorator): Here's what you missed on The Hidden Vegetable... red velvet cake was promised, but the first attempt was a disaster of epic proportions, and a second attempt has not yet been made... the author was shocked to discover that her favorite cupcakes haven't yet been posted... and one more year has come and gone. And that's what you missed on The Hidden Vegetable.
Happy Birthday to me!
Happy Birthday to me!
These are my most favorite cupcakes. Not because they are good for me, not because they have a hidden vegetable, but because they are simply the BEST CUPCAKES EVER!
I apologize for the yelling. In those caps, I am Dash from Disney/Pixar's the Incredibles, when he says "BEST DAY EVERRRR!" and proceeds to spin around and fall down in happiness. Because Dash, I know how you feel buddy, I know how you feel.
These are Ina Garten's pumpkin cupcakes.
I have never made her maple frosting. It looks delicious, I am just partial to chocolate frosting. Specifically, my chocolate frosting. My secret-recipe-best-ever-can-be-eaten-with-a-spoon chocolate frosting. (Otherwise known as the one bowl chocolate frosting from the unsweetened baking chocolate package... here is the link.)
Cupcake Ingredients
1 cup all-purpose flour
1 teaspoon baking powder
1/2 teaspoon baking soda
1/2 teaspoon kosher salt
1 teaspoon ground cinnamon plus a little extra!
1/2 teaspoon ground ginger plus a little extra!
1/2 teaspoon ground nutmeg plus a little extra!
2 extra-large eggs, at room temperature
1 cup canned pumpkin purée (8 ounces), not pie filling plus a little extra!
1/2 cup granulated sugar
1/2 cup light brown sugar, lightly packed
1/2 cup vegetable oil I use walnut oil
Directions
Preheat oven to 350, line 12 muffin cups with liners (note: she says 10, but I have always made 12, maybe it's my extra spices...).
It's the usual, combine dry ingredients, combine wet ingredients, mix both together just until moist. Spoon into cups, bake 20-25 minutes.


Frosting Ingredients
4 oz. BAKER'S Unsweetened Chocolate
1 pkg.
(16 oz.) powdered sugar
1/2 cup butter, softened
2 tsp. vanilla (oops, I only used one...)
1/3 cup milk
1/2 cup butter, softened
2 tsp. vanilla (oops, I only used one...)
1/3 cup milk
Sunday, April 14, 2013
Beets
Beets!
They have been staring at me recently at the grocery store... whispering... "I'd be so beautiful as a puree..." and "look at how dark and pretty I am..." and "you know you want me..."
But the mom in me is whispering back... "oh but it'll take so long..." and "I have a headache..."
I have been thinking lately about making food fun colors, and beets are perfect for that. They were on sale, so I gave in to the seductive whispering, and bought some.
Fun colors aren't exactly hidden veggies... well, okay, they are not at all hidden veggies, but they are a fun and different way to incorporate more veggies, so we'll count it! Plus the whole point of this vegetable blog is really to eat more and different veggies, and we are doing just that.
So, I chopped them, boiled them (saved that beautiful water), pureed them, and you know what? They were right. They might not be the most humble vegetable, but look how beautiful the color is:

I went right to work, and within minutes I had thin beet puree, thick beet puree, beet juice, beet popsicles, and plans for lots of pink food. Liiiiiike, pink mashed potatoes! (I swear this is not play-doh!)


We had these for dinner tonight. They are just regular 'ole mashed potatoes with enough beet puree to barely taste it if you thought about it really hard. The research team loved them!
The verdict:
"These mashed potatoes can't be beet!"
My research team thinks we should name these potatoes "hard to beet potatoes" but I like "play-doh 'tatoes," what do you guys think?
Here is a picture of the beet juice, which is made from the water the beets were boiled in. I added a little maple syrup to sweeten it, and also a little lemon juice. In the plastic cup on the left is the beet juice, and my research team added orange juice to his, it's on the right.

The juice is okay. I know this is going to come as a shock but.... it tastes like beets. :) I'm going to give it a couple days and see if it grows on me or if I can tweak it. My two year old drank all of his, so that wasn't an issue! Now I know what to give him when he requests juice! Bwaaahahahah, now that's hidden veggies!
ps. Do you see red velvet cake in the future? I do!
Wednesday, March 6, 2013
Chocolate Truffle Pie
After my last disaster with not at all hidden avocados, a friend of mine recommended a recipe for Chocolate truffle pie, made with avocados. I am a sucker for desserts with hidden veggies (well, really I am just a sucker for desserts, and the hidden veggies mean I can have two slices right?), so I figured I'd try the whole hidden-avocados-in-chocolate-thing again.
Here is the link from Free Coconut Recipes, if you want to check it out.
This recipe is great for a lot of different reasons. Healthy fat. No white sugar. No dairy. No gluten if you wish. Hidden veggies. (I know what you are thinking. There is no way it is going to be any good. I know the feeling, I am skeptical of any dessert that doesn't contain large amounts of butter. What? I learned it from Paula Dean.)
Here we go.
Ingredients:
1/2 cup water
1/2 cup honey
1/2 cup cocoa (1/3-1/2 cup cocoa (to taste))
1/8 teaspoon salt (1/8 -1/4 teaspoon salt (to taste))
1/2 cup expeller pressed coconut oil
2 avocados
1 teaspoon vanilla extract
One 8" graham, crumb, or nut crust


The Verdict(s):
First...
"Mmmm... this is really smooth."
Then...
"But something is weird. It's not the right kind of sweet."
Next was...
"The second bite is better than the first."
And finally...
"This is good, once you get your expectations straightened out."
It is good. I'd really like to try it out on some poor unsuspecting soul... my research team is suspicious of everything I make. (Gee, I wonder why?!? :))
It's rich and smooth, it's texture is not like a chocolate cream pie, but more like... well, a truffle!
My research team says he can taste the avocado. I'm not sure if we just think we can taste it because we know it is in there, or if we can actually taste it. I do think it tastes more like avocado if it warms up a little bit, so I'd advise to keep it refrigerated until eating.
I will definitely be making this pie again. I'd like to try it with peanut butter also. Maybe peanut butter instead of the coconut oil? I'll let you know how it goes!
UPDATE
I substituted peanut butter for the coconut oil and here is the new verdict:
"I can't taste the avocado, even when I try!"
It was chocolate-peanut butter deliciousness, but it was a little soft, so next time I might add a little coconut oil back in to see if I can firm it up a little bit. Look for update number 2!
Here is the link from Free Coconut Recipes, if you want to check it out.
This recipe is great for a lot of different reasons. Healthy fat. No white sugar. No dairy. No gluten if you wish. Hidden veggies. (I know what you are thinking. There is no way it is going to be any good. I know the feeling, I am skeptical of any dessert that doesn't contain large amounts of butter. What? I learned it from Paula Dean.)
Here we go.
Ingredients:
1/2 cup water
1/2 cup honey
1/2 cup cocoa (1/3-1/2 cup cocoa (to taste))
1/8 teaspoon salt (1/8 -1/4 teaspoon salt (to taste))
1/2 cup expeller pressed coconut oil
2 avocados
1 teaspoon vanilla extract
One 8" graham, crumb, or nut crust
Directions:
Bring water and honey to a boil; add cocoa and salt. Stir until smooth. Pour into a blender. Add the
avocado pulp, coconut oil and vanilla. Blend until smooth.
Pour into the pie crust. Chill in the refrigerator 4 hours or until firm.
This recipe was super easy to make, oh also, I used a store-bought graham cracker crust, so that helped.
I tasted the filling as I was pouring it into the crust, and I could taste the avocado, but I wasn't concerned. It is not uncommon to taste the hidden veggie in the batter of other desserts.
Here are pics of the finished product.


The Verdict(s):
First...
"Mmmm... this is really smooth."
Then...
"But something is weird. It's not the right kind of sweet."
Next was...
"The second bite is better than the first."
And finally...
"This is good, once you get your expectations straightened out."
It is good. I'd really like to try it out on some poor unsuspecting soul... my research team is suspicious of everything I make. (Gee, I wonder why?!? :))
It's rich and smooth, it's texture is not like a chocolate cream pie, but more like... well, a truffle!
My research team says he can taste the avocado. I'm not sure if we just think we can taste it because we know it is in there, or if we can actually taste it. I do think it tastes more like avocado if it warms up a little bit, so I'd advise to keep it refrigerated until eating.
I will definitely be making this pie again. I'd like to try it with peanut butter also. Maybe peanut butter instead of the coconut oil? I'll let you know how it goes!
UPDATE
I substituted peanut butter for the coconut oil and here is the new verdict:
"I can't taste the avocado, even when I try!"
It was chocolate-peanut butter deliciousness, but it was a little soft, so next time I might add a little coconut oil back in to see if I can firm it up a little bit. Look for update number 2!
Tuesday, February 5, 2013
Choco-cado Mousse
So excited, I got my new Parenting magazine this week! I know I know, I'm old school, but I just love getting fun stuff in the mail. And I like Parenting because it has ideas about 'how to tame your toddler' and 'dress like the stars.' (Since that is the most important parenting subject... I didn't realize parents or kids had to get dressed? Unless of course we go to the fancy grocery store.)
Anyway, I found an article with many different (kid friendly) uses of avocado. Hmmm, that is right up my alley. And then I came across "Choco-cado mousse." WHaaaaaaa??? I like avocados, but avocados that taste like chocolate? Sounds even better. Sounds like a perfect hidden vegetable. Sounds like "Hey kids, here, dip your pretzels in this chocolate dip!" Sounds like "I found a chocolate spread for my graham crackers!" Sounds like "I think I'll have chocolate mousse for snack!"
I got right to work.
Here are the instructions from the article:
Combine:
1 avocado
1 tsp cocoa powder
1/2 tsp agave nectar (or honey for kids 12 months and up)
1/4 cup skim milk
Puree until smooth.
Here we go:

Ummm?:

This does not look like mousse (and anyone who has kids knows exactly what it does look like!). It does not taste like chocolate. It tastes like avocado. In fact, in a blind test I think I may have believed it was just pureed avocado. Which is not a problem, except it is supposed to taste like chocolate mousse.
We ate it anyway, as a dip:

But it leaves me to wonder... do they test their recipes? What is the purpose of adding chocolate and honey if you can't taste it at all? Was there a typo? Was my avocado twice as big as theirs?
Well, not to worry, I tried again. I added an additional tablespoon cocoa powder, an additional tablespoon of honey, plus a splash of vanilla.

Well it looks better, but still has a very strong avocado after-taste. In a separate bowl I put about half of the avocado mixture and dumped chocolate and honey on it until it was way to much, and that bowl was very sweet and chocolatey, but somehow also still avocado.
Here is what I think: avocado and chocolate just don't go together. The flavors just don't suit each other. In all the amounts that I tried, it just isn't something I would want to eat by the spoonful. My 2 year old did though, so that's something. But he is also a kid who can be bribed with pureed peas, so he might not be the best example.
The Verdict:
"It's edible."
My research team felt that this was a waste of good avocados, and after doing the experiment, I have to say that I agree.
Guacamole, we're baaaack!
Thursday, January 10, 2013
G-Ma's winter salad
I have never been able to reproduce my mothers cooking. Never. Not her delicious biscuits, not her best in the world chocolate chip cookies, not her famous green chili...
To be fair, it's not her fault. She can't follow a recipe for the life of her, and I know this. (Hmm, sound familiar?) Let me tell you a little story about the time I found out why I cannot replicate her cooking...
Once upon a time, in a not so far away land, 3 months ago (wow, has it already been three months?) my mother came to visit after the birth of our baby girl. She made her best-ever-my-most-favorite-chocolate-chip cookies whilst she was here. I'm helping her (trying to figure out what I am doing wrong), and as I start to measure the baking soda I hear from behind me..."Oh, I always add a little less..." and so it went with the next ingredient, and the next, measuring, mixing, sigh. She is giving me the recipe she follows, only SHE'S NOT FOLLOWING THE RECIPE! Well, now I know. I will never be able to replicate her amazingness, because she doesn't measure anything, and she is magical.
Fast forward about 3 months and we visited my parents over the Holidays. My mom has been making this "winter salad" that she and my dad love, and as it turns out, my research team could not get enough of the stuff! One night the after dinner conversation went like this...
Dad: "Anyone want some ice cream?"
Me: "Yes please!"
Research Team: "Can I have more salad?"
No, seriously. And he wasn't joking.
Fast forward two more weeks to today, and guess what.
No, guess. I think you might get it!
Fine, I'll tell you.
I REPLICATED MY MOM'S WINTER SALAD!!! No, I really did. It turned out just like hers. I am so happy, maybe, just maybe, I am a little magical too. (Or, with this particular salad, the ingredients are so good that the measurements don't really matter... or I'm magical too, either one.)
Note: I realize that the vegetables in a salad aren't hidden, but I figure, the goal is to eat more veggies, and my research team is definitely doing that!
Ingredients:
The must haves:
Green cabbage
Green onions
Blue cheese
Extra virgin olive oil (my mom says it has to be the good one... but I can't remember which one that is!)
Balsamic vinegar
Black pepper
Also choose one or more of the following:
Red peppers (my mom's favorite)
I used strawberries
Any other fruit or veggie or dried fruit or nuts
Directions:
Chop half of a cabbage head. Put in large bowl. Save the other half for tomorrow's salad. Chop green onions, add to bowl, chop strawberries, add to bowl. Add EVOO to salad, "enough to cover everything" yes, that is a direct quote from mom. Add balsamic vinegar to taste, sprinkle with blue cheese and pepper, stir. Eat. Enjoy.
OH! I almost forgot, here are some pictures:


I am swelling with pride, just looking at the pictures. :)
I know, you are rolling your eyes... thinking, 'it's just a salad, it's just... salad!'
Yes, it is just a salad, but it also might be the beginning of something magical! (Maybe I should try to make her cookies while I'm on a roll... Nah, I don't want to ruin it.)
Thursday, July 26, 2012
ABC Muffins
ABC Muffins. As in Apple Banana Craisin muffins, not Already Been Chewed muffins. That's right you generation texters, you have no idea what ABC stands for. You also have no idea that we from the 80's were so far ahead of our time. We were totally using awesome acronyms long before OMG and LOL. We always had to make sure our gum wasn't ABC gum.
Meh, who am I kidding... no one under the age of (Hey Sissy, how old are you again?) 29 reads my blog!
I have made ABC muffins twice now, and both times they were awesome. The first batch was ABC - apricot banana craisin, and the second batch was technically PBC - peach banana carrot. Because of the carrot, PBC is the recipe and pictures I've posted here on my blog.
Also, it is important to note that these are muffins. They are flavorful and delicious, but not very sweet. They are not bald cupcakes.
Ingredients:
1 3/4 cups whole wheat flour
2 teaspoons baking powder
1/2 teaspoon baking soda
2 tsp cinnamon
1 tsp nutmeg
1/2 tsp ground cloves
1/2 cup brown sugar
1/3 cup walnut oil
1 egg
2 bananas, mashed
1 peach chopped (1 apple or about 5 apricots)
1 peach chopped (1 apple or about 5 apricots)
1 cup shredded carrot (1/2 cup craisins)
Directions:
Preheat oven to 375. In a large bowl sift together flour, baking powder, baking soda, and spices. Add remaining ingredients. Mix well. Pour batter 2/3 full into muffin cups (yields 12ish... 15 the first time and 13 the second). Bake about 20 minutes, until browned.
Look how pretty all the yummy, healthy ingredients are!


The finished product is also very pretty.


As far as the hidden veggie goes, the carrots were shredded, so they were visible. A puree for veggies would be better for completely hiding them. My 1 1/2 year old gobbles them up, but he also eats only the veggies out of our macaroni and cheese, so he might not be the best gauge... wait, why am I hiding the veggies?
The Verdict:
"Yum."
The best thing about this recipe is the variations are endless. I could use vegetable puree in place of the banana, or any shredded or chopped fruit or veggie that is in season. Any dried fruit would be great... NUTS! I could add nuts! Cashew starts with C! Well, these are going to become a staple in our house, I can already tell.
Saturday, June 23, 2012
Not Betty Crocker's Hamburger Helper
So there I was, standing at the pantry thinking "I wish I was one of those people who bought hamburger helper" because I was too lazy to think of anything to make, much less cook it.
Not too lazy to look online to see if I could make homemade hamburger helper though!
I found this site and proceeded to make one of the many options for homemade hamburger helper. The great thing about hamburger helper, even from a box, is that it is all mixed together which makes it a great candidate for hidden vegetables.
I choose the chili cheese hamburger helper recipe and added pureed carrots. I've had success with carrots in spicy food before, it's a good sweet and spicy flavor.
So here goes:
Ingredients:
1 lb ground beef
1 cup hot water
2 cups milk
1 cup carrot puree (or I'd say any puree that is not green)
1 1/2 cups macaroni or whatever fun noodles you have
1 tablespoon corn starch
3/4 tablespoon chili powder
1 teaspoon garlic powder
1 teaspoon onion powder
1 teaspoon salt
1 teaspoon sugar
1/2 teaspoon paprika
1/2 teaspoon cumin
1 cup shredded cheese
(note: if you go to the site, you might notice I changed the spices a little bit)
Brown ground beef, drain fat. Add all other ingredients except cheese. Bring to a boil, cover and simmer on low for 12 minutes or until noodles are tender. Add cheese for the last few minutes of simmering. When cheese is melted and noodles are done, let stand uncovered for a few minutes to thicken.
Oh WAIT! I forgot to tell you the best part! Here it is: my sister bought me one of these for my birthday:

So awesome! It is so easy to puree the veggies, and the clean up is SO much easier than my blender. See, here are the carrots and water in the pot they boiled in:
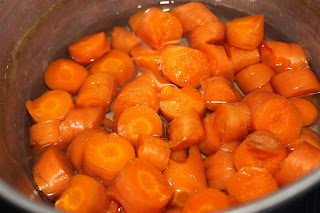
Then I blend them in the same pot:

TA DA! So easy.
Anyway, back to the homemade hamburger helper... here is a picture:

We liked it, and the veggies were well hidden. No one would guess they were there. We had it with salad, and even our 18 month old ate some. :)
The verdict:
"I wouldn't know there were veggies if I hadn't seen you take a picture of it."
Sigh, he is on to me.
Not too lazy to look online to see if I could make homemade hamburger helper though!
I found this site and proceeded to make one of the many options for homemade hamburger helper. The great thing about hamburger helper, even from a box, is that it is all mixed together which makes it a great candidate for hidden vegetables.
I choose the chili cheese hamburger helper recipe and added pureed carrots. I've had success with carrots in spicy food before, it's a good sweet and spicy flavor.
So here goes:
Ingredients:
1 lb ground beef
1 cup hot water
2 cups milk
1 cup carrot puree (or I'd say any puree that is not green)
1 1/2 cups macaroni or whatever fun noodles you have
1 tablespoon corn starch
3/4 tablespoon chili powder
1 teaspoon garlic powder
1 teaspoon onion powder
1 teaspoon salt
1 teaspoon sugar
1/2 teaspoon paprika
1/2 teaspoon cumin
1 cup shredded cheese
(note: if you go to the site, you might notice I changed the spices a little bit)
Brown ground beef, drain fat. Add all other ingredients except cheese. Bring to a boil, cover and simmer on low for 12 minutes or until noodles are tender. Add cheese for the last few minutes of simmering. When cheese is melted and noodles are done, let stand uncovered for a few minutes to thicken.
Oh WAIT! I forgot to tell you the best part! Here it is: my sister bought me one of these for my birthday:

So awesome! It is so easy to puree the veggies, and the clean up is SO much easier than my blender. See, here are the carrots and water in the pot they boiled in:

Then I blend them in the same pot:

TA DA! So easy.
Anyway, back to the homemade hamburger helper... here is a picture:

We liked it, and the veggies were well hidden. No one would guess they were there. We had it with salad, and even our 18 month old ate some. :)
The verdict:
"I wouldn't know there were veggies if I hadn't seen you take a picture of it."
Sigh, he is on to me.
Thursday, May 17, 2012
Good thing Gordon Ramsay wasn't here... Scallops!
Imagine this, with scallops, and that is my experience with them. Well, not MY experience... I watched season 8 of Hell's Kitchen in support of one of my high school classmates who was on the show. And for the record, she should have won... but anyway, Gordon Ramsay smashed quite a few raw scallops that season, so I was both excited and intimated as I purchased them at the store. I actually thought "Oooh, scallops! I bet I could really piss Ramsay off!"
I have never even eaten scallops before, but this whole "eat fish once a week" resolution is broadening my horizons!
It's strange to try cook something I have not eaten before... what was I thinking?!? What is a scallop, anyway? How do I know if it's done? How do I know if it tastes right? What if Ramsay shows up and throws me out of the kitchen?
Turns out that scallops are a shellfish like clams or oysters, but get this, they move through the water by opening and closing their shell. That is why they are so much larger than clams or oysters, because they are so much stronger. There are bay scallops which are small, and sea scallops which are large. The ones I bought must be sea scallops?
I watched this tutorial "How to cook perfect scallops with Gordon Ramsay" which is really Ramsay channeling Bob Ross and impossible to follow at his speed. (Also, if you watch the video, there is a part 2.)
But I picked up what I could, and I also read a few other blogs and pages about scallops to fill in where Ramsay sped on through. Here are some things I picked up:
-there is a "foot" that needs to be pulled off
-scallops must be cooked quickly
-and eaten right away
-overcooked scallops are rubbery
-there should be a nice golden "crust"
So, I followed Ramsay's tutorial and here is what I did:
Based on what I read, they are sort of translucent before they are cooked, and white afterward. (Protein is always like this, for example, with eggs we can really see the change.)
SO... here are the pictures:


Not too bad, eh?
We ate them and they tasted like fish. They were cooked all the way through, and none were rubbery, so I'd say I did alright. :)
The Verdict:
"We should have these again!"
We actually did really like them, and will definitely have them again. I will probably look up some other recipes because it sounds like they are also good with a cream or butter sauce. Hmm... cream sauce sounds like a chance for hidden veggies! We'll see...
The thing I am not telling you is... that Ramsay would have thrown me out of the kitchen, maybe not for my scallops, but definitely for the rice. I ruined the RICE?! Who does that?! Well, me... completely ruined it. Too salty, too crunchy, yucky, nasty AAHHHH SMASH!!! Too focused on the scallops I guess! ;)
ps. I have made deviled eggs with hidden cauliflower twice since my post, both times with great success!
I have never even eaten scallops before, but this whole "eat fish once a week" resolution is broadening my horizons!
It's strange to try cook something I have not eaten before... what was I thinking?!? What is a scallop, anyway? How do I know if it's done? How do I know if it tastes right? What if Ramsay shows up and throws me out of the kitchen?
Turns out that scallops are a shellfish like clams or oysters, but get this, they move through the water by opening and closing their shell. That is why they are so much larger than clams or oysters, because they are so much stronger. There are bay scallops which are small, and sea scallops which are large. The ones I bought must be sea scallops?
I watched this tutorial "How to cook perfect scallops with Gordon Ramsay" which is really Ramsay channeling Bob Ross and impossible to follow at his speed. (Also, if you watch the video, there is a part 2.)
But I picked up what I could, and I also read a few other blogs and pages about scallops to fill in where Ramsay sped on through. Here are some things I picked up:
-there is a "foot" that needs to be pulled off
-scallops must be cooked quickly
-and eaten right away
-overcooked scallops are rubbery
-there should be a nice golden "crust"
So, I followed Ramsay's tutorial and here is what I did:
- Rinse the scallops and pat them dry, unless they are dry-packed, then no rinsing needed. I rinsed mine.
- Heat up a pan with some kind of oil or oil/butter combination until almost smoking (I used olive oil, mine was smoking, but no smoke alarm I swear)
- Season the scallops with salt and pepper, only salt and pepper
- Set the scallops in pan starting at 12:00 and working around the clock (DO NOT MOVE THEM)
- Cook for 2 minutes (I only timed the 12:00 scallop and the others just followed along)
- Flip them and cook 1 min (Oh crap! I just remembered that I forget to squirt some lemon juice on them at this point! AHHHH, SMASH!)
- Remove scallops - it is easy to overcook scallops
Based on what I read, they are sort of translucent before they are cooked, and white afterward. (Protein is always like this, for example, with eggs we can really see the change.)
SO... here are the pictures:


Not too bad, eh?
We ate them and they tasted like fish. They were cooked all the way through, and none were rubbery, so I'd say I did alright. :)
The Verdict:
"We should have these again!"
We actually did really like them, and will definitely have them again. I will probably look up some other recipes because it sounds like they are also good with a cream or butter sauce. Hmm... cream sauce sounds like a chance for hidden veggies! We'll see...
The thing I am not telling you is... that Ramsay would have thrown me out of the kitchen, maybe not for my scallops, but definitely for the rice. I ruined the RICE?! Who does that?! Well, me... completely ruined it. Too salty, too crunchy, yucky, nasty AAHHHH SMASH!!! Too focused on the scallops I guess! ;)
ps. I have made deviled eggs with hidden cauliflower twice since my post, both times with great success!
Tuesday, May 8, 2012
Even better Chocolate chip cookies
Now that I have been eating again (if you just started reading, no I didn't have an eating disorder... just the first trimester of pregnancy) in order to feel good all day, I have to eat 3 cookies a day. I can hear your thoughts and see the eyes roll, but I can't explain it.... my stomach doesn't feel very good, I eat a cookie, and I feel better! My worst days since eating again have been when I haven't had any cookies.
Well, if you know me, this is an unacceptable amount of junk food, even if I am pregnant! So I decided that if I am going to eat this many cookies, I better take some measures to make "better" cookies.
I needed to make them better for me in more than one area: avocados for butter, whole wheat flour for white, and maple syrup for white sugar. I replaced the "white" food in amounts which I thought wouldn't totally ruin the cookies.
I also threw in some whole oats, and would have also added nuts if we had any.
So these cookies have several things going for them.... they don't have as much of the "bad" ingredients, and they do have additional "good" ingredients. (I hate labeling any food "bad," even butter... everything has it's place. I just couldn't think of better wording...)
Ingredients:
1 cup whole wheat flour
1 cup white flour
1 tsp baking soda
1 tsp baking powder
1/2 tsp salt
1/2 cup butter
1 avocado
3/4 cup brown sugar
1/4 cup white sugar
2 eggs
1/2 cup maple syrup (100% pure here people, not flavored sugar water)
2 tsp vanilla
1/2 cup whole oats
1/2 cup chopped walnuts
Bag o' favorite chocolate chips
You know the drill:
1. Combine all dry ingredients (flours, baking soda, baking powder and salt) and set aside.
2. Cream butter, avocado, and sugars (don't add the maple syrup yet)
3. Add eggs one at a time, beat well after each addition
4. Add maple syrup and vanilla beat well
5. Mix in flour 1 cup at a time
6. Add chocolate chips and oats
For pan style cookies (my Mom always makes them this way), spread in greased 15x10 inch jelly roll pan, bake 350 degrees, 20-25 minutes.
See?

I meant to take a picture before I ate a cookie, but, well, I needed a cookie and I needed it RIGHT THEN.

I have tried to label all cookies as "pregnancy food" and make them off limits to my research team, but *sigh* for the purpose of this blog I had to let him have one... :)
The Verdict:
"These are delicious." (He sounded shocked, and I tried not to let that hurt my feelings.:)) "They are moist and sweet."
They are sort of fluffy for cookies. I would be curious to see how they turned out as individual cookies, but I like them the best this way. Plus, I am lazy. This way I only have to bake one batch in one pan once.
These really are good, I don't think anyone would guess they have been altered to be healthier than the average cookie. And they have now be taste tested by a few other randomly chosen research team members who randomly showed up for dinner, who said they were "too good."
Too good! Well, that is about as good as it can get when hidden veggies are concerned!
Friday, May 4, 2012
Deviled Eggs
You see them on the plate at the party, and its like they are drawing you in... you can't resist them and their creamy delicious center...
So what is my plan? Oh, you know what it is. Here are your options:
a. eat the whole plate
b. ruin them with hidden veggies
c. make them delicious with hidden veggies?
d. all of the above
My deviled egg recipe was given to me from my brother-in-law, Smash. (Actually, I secretly wrote it down as he was making them, same thing, right?) Smash is my research team's brother, and he is my idol in the kitchen. Sometimes when he is making something, I follow him around, or sit and watch in awe as he makes delicious things come together effortlessly... I hope he doesn't read this, he might think I have a crush on him, and that would just be weird.
Back to the eggs!
So I decided I'd make a batch and divide it into three parts: one would stay original, one would get cauliflower puree, and the third would get carrot puree. I thought it would be hilarious to not tell my research team anything and just see what he thought, but he is on to me. He knew there was hidden veggies as soon as I told him there were three different recipes. La-ame! Oh well, it was still fun to eat a bunch of deviled eggs!
Here is the recipe:
I call these Magic Deviled Eggs, because I don't have amounts of the ingredients because Smash didn't measure anything, he just mixed it right in. So they are magic because... it doesn't matter how much of anything, it always turns out great! (Yeah, right. Smash is just magic, I am only pretending.)
So I started with 6 whole eggs, which would end up as 12 halves, 4 of each flavor.
I halved the boiled eggs, mashed all the yolks together and added:
Miracle Whip
Mustard
Worcestershire Sauce
Pickle relish
Dill
Fresh green onion (or onion powder)
Horseradish
Hot sauce
Note: add more of what you like, and don't skimp on any of the flavors! (Is skimp a word?)
Then I stirred it all together and divided it in three parts.
I added 1 tablespoon of cauliflower puree to one batch and 1 tablespoon carrot puree to another batch.
I used plastic baggies to "pipe" the yolk mixture back into the eggs, and sprinkled them with paprika:

Yum!! Looking at the pictures makes me happy. :) It is hard to see the difference in the pictures, but in the above picture the egg on the right is the original recipe, the middle has cauliflower, and the egg on the right has carrot. The carrot egg is more orange, although it is hard to see in the pictures.

This plate is the same order as the above picture (if I make the picture bigger, does that help?).

But this picture is reversed: carrot on the left, cauliflower in the middle, and original on the right. Do you see the difference yet?
The Verdict:
"I could not distinguish between the original and the cauliflower egg. The carrot puree did have a different flavor. The bottom line is, cauliflower hides really well."
This was a really fun experiment!
All the eggs were good, and even I couldn't taste the cauliflower. The carrot did change the flavor, but it would probably not be recognizable without knowing what it was. Also if you make your deviled eggs on the spicier side, carrot would be easier to hide because the flavor would cover it better and the carrot color would make the eggs look spicier.
I'd say this was a huge success! So... I used 1 tbs puree for 2 whole eggs, which comes to about 1/3 cup of puree for 12 whole eggs. However, I am confident enough in the yolks hiding the veggies that I would probably use 1/2 cup puree for 12 whole eggs (or more! I haven't ruined them yet!).
Well, now that there are hidden veggies in the deviled eggs, I choose:
a. Eat the whole plate!
Thanks for the recipe Smash!!
Sunday, April 29, 2012
Fish Dish Numero Uno
Here it is, my first fish dish post!
We have had this recipe several times already and it is SO good that I am going to create a 'done fish dish' tab above just so I have somewhere official to put this.
My brother-in-law and his wife turned us on to this salmon recipe, they said it was the best, and they were right. It hasn't failed us yet, and we usually manage to screw something up! (To give you an idea how good it is, in the four weeks that we have had fish once a week, three of the weeks were this recipe.)
We buy the wild salmon from the fish counter at the grocery store which allows us to pick exactly the amount we need for no leftovers, and the wild salmon is as fresh as we're going to get here in Colorado.
Salmon marinade:
(note: According to the recipe this is for 4 six ounce fillets, but my brother-in-law doubles the recipe when he makes 4 fillets. I have been making this exact recipe for the 1/2 lb of salmon we get.)
1/4 cup brown sugar
1/4 cup olive oil
1/4 cup soy sauce
2 teaspoons lemon pepper
1 teaspoon dried thyme
1 teaspoon dried basil
1 teaspoon dried parsley
1/2 teaspoon garlic powder
Whisk all ingredients together. Put salmon into plastic bag, pour marinade over it, seal and refrigerate for one hour. (We have done less time and it still turned out great.)
At this point I hand the bag and a cold beer to my research team (he says he can't grill without a beer...) who expertly and magically prepares the salmon on the grill. If you need instructions on this part, here is the link to the recipe. :)
Well now that I am publishing my fish dish of the week, I feel a little more motivated to make some different dishes... which is kind of scary. Wish me luck!!
Next time, more hidden veggies!
Tuesday, April 24, 2012
Potato Salad
I'm baaaaack! Here are my excuses for not posting since December....
First it was the holiday season. The holidays are not a time for hidden veggies, they are a time for pigging out on delicious food made with butter. There has to be exceptions, and what better time than the holidays...am I right?
Then in January we found out we were expecting our second baby! This was promptly followed by me puking my guts out for months and therefore not cooking, eating, or spending any time anywhere that smelled remotely like food. (My poor research team was left fending for himself and our son... thankfully, they survived.)
Now it's the end of April and I am so happy to be back in the kitchen... this weekend I made my mom's chocolate chip cookies, then I made her coffee cake, oooh, I also made fresh salsa, we marinaded and grilled chicken one night, then red snapper the next night... it has been so good to EAT again!! So, I'm back.
I am going to add something to my hidden veggie blog. This year, before the puking, I made a New Year's resolution to have fish for dinner once a week. Since my research team and I don't eat much fish usually, every week will be an experiment. So along with new and improved hidden vegetable recipes, I will post our most successful (or maybe the biggest disaster...) fish recipes. Also, if anyone has any great family favorite fish, or any seafood dinners, I'd love to hear them!!
So onto my hidden veggie recipe of the week.... Potato Salad!
Here in Grand Junction it has started to feel like summer, and nothing says summer like grilling burgers and a good potato salad. So I googled "best potato salad" and went about butchering the recipe. :) Here is the original recipe if you are interested.
I basically halved the recipe and added my own little something.
Ingredients:
2.5 lbs red potatoes
1/4 small yellow onion, chopped
1 cup red pepper, chopped
3 hard boiled eggs, chopped
1 cup cauliflower puree (I should note that I made this puree with milk instead of water so that it would be creamier)
1/2 cup miracle whip
3 tbs cup mustard
2 tbs sweet pickle relish
bunch green onions
salt and pepper
garnish with paprika and green onions
Chop potatoes, boil until soft, cool. Mix all ingredients together, chill until meal time.
Here are some photos:


(Yes the pineapple on my mini burger is larger than the hamburger... what can I say.)
The verdict:
"Good enough to take to a potluck."
It wasn't as creamy as potato salad made with a gallon of mayo, it had a lighter feel to it, which I liked. I felt like it was a little bland, so since we have left overs I may add a little something more to it tonight and see the difference tomorrow.
On the plus side, there was no sign of the cauliflower at all, so this was a successful hidden veggie!
**I sprinkled dill and Worcestershire sauce and stirred them in, it sat overnight. The new verdict? It was better, but maybe just because all the flavors meshed better overnight? I think this recipe is pretty good, but I am going to experiment with it at least one more time before posting under in the 'done' recipe tag.**
Tuesday, December 6, 2011
Mac and Cheese
I know I said I would do veggie bread next, well... epic failure. So
bad, that I am not going to blog about it. No joke. I totally
butchered the recipe trying to make it healthier and well... not even
edible. So, moving on!
The good news is....I think I have done it. I think this may be as good as it is going to get for my mac and cheese. Wait until you see the picture! It looks just like homemade mac and cheese!
BUT first things first! Did you notice my two new tabs up above?!? That's right, 6 months later, I have started my "done" recipe pages! Right now there is only two recipes or so that I think are good enough to be considered "done" but hey - it's a start! Annnnd, I think this recipe will go over there also.
Cheese sauce ingredients:
1 cup cauliflower puree
1 cup shredded cheese
1 tsp yellow mustard
1/2 cup milk
Salt, pepper, garlic powder
Cook on medium-low stirring often until smooth.

Pour over macaroni noodles and LOOK, LOOK LOOK at how great it looks!!!

So you understand why I am so excited, you might need to look back at the pictures from my last mac and cheese attempt...
So, it wasn't super orange, but 1/2 cup cauliflower puree and 1/2 cup carrot would solve that problem. I do think it's important to puree the purees as smooth as possible. This was as smooth as I have ever made it, and there was still a tiny hint that something else was in there, but like I said, I think it's as good as it will get.
Also this recipe was barely enough for my research team and I, so... just so you know. :) Well, I guess D had some too, it was his first mac and cheese! See, train them young, and they'll never know mac and cheese isn't supposed to have pureed veggies! Hmm... I wonder if I should make him part of the research team?
The Verdict:
"It's so much creamier than last time! Is there more?"
Next time... maybe veggie bread? Maybe. Hopefully. I promise to try and follow the recipe... a little closer...
Wednesday, November 30, 2011
Mini Cheese Quiche
I have two confessions before I get started here.
First: It was all I could do not to title this blog Mini Cheesy Quichey.
Second: I ate four cookies just now. Which is an unacceptable amount of cookies to eat while making dinner! In case you missed it, check out these chocolate chip cookies with avocado for half the fat, which, really, doesn't make it any better that I just ate four of them right before dinner.
Anyway, normally when I make quiche I put lots of veggies in it that are not hidden at all... spinach, green peppers, tomatoes, or whatever we happen to have in the fridge. So it actually didn't occur to me to hide veggies in it until I saw a recipe for mini cheese quiches on a "kid friendly" menu. Ah ha! Now I can try and hide veggies in something that shouldn't have any.
I found a handful of recipes online, and this is what I came up with after looking at them. One interesting thing I read was to use bread as the "pie crust." Just roll it out before putting into the muffin pan. So, since I don't have any puff pastry or pie crust, I thought I'd give that a try.
I should also note that I used a jumbo cupcake pan. In the jumbo pan this recipe made 6 quiches, so it would probably make 12 in a normal size cupcake pan.
Ingredients:
6 bread slices rolled flat
4 eggs
1/2 cup cauliflower puree
1/2 cup squash puree (Note: you can use any white/yellow/orange puree combination that totals one cup)
1/4 cup milk
1 cup shredded cheese
Directions:
Preheat oven to 400. Roll bread slices flat and press/fold into cupcake pan. Press cheese into the bottom of the crusts.

Wisk together eggs and milk. Wisk in purees. Pour egg mixture into crusts.

Bake approximately 20 minutes or until set.

See how cheesy it looks? Mm mmm, and it smells like toast.
While I was finishing dinner, my research team served our 11 month old some bread with carrot fondue... I think this veggie thing is catching on! Even I haven't completely replaced cheese with veggies!

He also ate veggies hidden in quiche... sort of. Mostly he smashed it on the tray. But I have proof of at least one bite:

They turned out pretty yummy! I felt like I could taste the squash in them, but the research team couldn't taste the veggies at all. He knew there were veggies, but said it tasted like cheese quiche.
In the future I think will add some spices (I'm actually not sure why I didn't this time) ... salt, pepper, garlic and onion powder, but I think that is all I would change.
Also the bread-for-crust turned out really well! It wasn't quite as tasty as the biscuit recipe I use for my chicken pot pies, but it was good.
The Verdict:
"Fooled the baby!" (and the Daddy too...)
Next time... either veggie bread or brownies... the way I ate those cookies I'm thinking I should hold off on the brownies for a little while, even if they do have spinach in them! ;)
Saturday, November 26, 2011
Sweet Potato Pie
Happy Thanksgiving!
I was in charge of a few pies for Thanksgiving, and since my research team isn't a big fan of pumpkin pie (I know, I know, I don't know what is wrong with him either!) we made sweet potato pie instead. Which is HILARIOUS, because sweet potato pie tastes just like pumpkin pie. :) Moving on...
Actually, there are a few things about sweet potato pie that are better than pumpkin. For example, if you want to make it from the actual vegetable, and not from a can, sweet potatoes are much easier to deal with than pumpkin. No carving with a massive knife, no seeds, no stringies, no pumpkin splattered all over your computer... well, I suppose that could happen with sweet potato, it just hasn't happened to me... yet!
I've made sweet potato pie in the past and this is my favorite recipe so far.
I looked up a recipe on allrecipes.com and then also made some of the changes suggested in the comments. It turned out so good. Here is the recipe with the suggested additions/changes:
1 pound of sweet potatoes
1/2 cup butter
1/2 cup white sugar
1/2 cup brown sugar
1/2 cup milk
2 eggs
1/2 teaspoon nutmeg
1/2 teaspoon cinnimon
1/4 teaspoon ground ginger
1/4 teaspoon ground chives
1 teaspoon vanilla
1 tablespoon flour
1 pie crust
Well, I checked a few other recipes and found 2 cups of mashed sweet potatoes, and also 3 medium sweet potatoes. I happened to have 3 medium sweet potatoes, so that is what I boiled. But when I mashed them up it seemed like WAY more than 2 cups, so I didn't use it all. I didn't measure it though (of course...), which I really should have done considering that I ended up with two pies worth of sweet potato pie filling.
I was in charge of a few pies for Thanksgiving, and since my research team isn't a big fan of pumpkin pie (I know, I know, I don't know what is wrong with him either!) we made sweet potato pie instead. Which is HILARIOUS, because sweet potato pie tastes just like pumpkin pie. :) Moving on...
Actually, there are a few things about sweet potato pie that are better than pumpkin. For example, if you want to make it from the actual vegetable, and not from a can, sweet potatoes are much easier to deal with than pumpkin. No carving with a massive knife, no seeds, no stringies, no pumpkin splattered all over your computer... well, I suppose that could happen with sweet potato, it just hasn't happened to me... yet!
I've made sweet potato pie in the past and this is my favorite recipe so far.
I looked up a recipe on allrecipes.com and then also made some of the changes suggested in the comments. It turned out so good. Here is the recipe with the suggested additions/changes:
1 pound of sweet potatoes
1/2 cup butter
1/2 cup white sugar
1/2 cup brown sugar
1/2 cup milk
2 eggs
1/2 teaspoon nutmeg
1/2 teaspoon cinnimon
1/4 teaspoon ground ginger
1/4 teaspoon ground chives
1 teaspoon vanilla
1 tablespoon flour
1 pie crust
Directions
- Boil sweet potato whole in skin for 40 to 50 minutes, or until done. Run cold water over the sweet potato, and remove the skin.
- Break apart sweet potato in a bowl. Add butter, and mix well with mixer. Stir in sugar, milk, eggs, nutmeg, cinnamon and vanilla. Beat on medium speed until mixture is smooth. Pour filling into an unbaked pie crust.
- Bake at 350 degrees F (175 degrees C) for 55 to 60 minutes, or until knife inserted in center comes out clean. Pie will puff up like a souffle, and then will sink down as it cools.
I didn't quite follow the directions exactly (you know me!), but I wanted to put them up here for next time I need this recipe!
So, one of the funny things about this recipe is the 1 pound of potatoes requirement. I don't have a scale in my kitchen, do you? Am I the only one who doesn't, and if so, how did I miss that?
Well, I checked a few other recipes and found 2 cups of mashed sweet potatoes, and also 3 medium sweet potatoes. I happened to have 3 medium sweet potatoes, so that is what I boiled. But when I mashed them up it seemed like WAY more than 2 cups, so I didn't use it all. I didn't measure it though (of course...), which I really should have done considering that I ended up with two pies worth of sweet potato pie filling.
Anyways, I didn't want to wait 40-50 minutes for the potatoes to bake, so I peeled, cut up, and boiled them. Honestly, it probably still took 40 minutes... then I really did follow the recipe, I swear.
Like I said, I ended up with two pies, luckily I had two pre-made crusts in the freezer! I thought that it would turn out fine since a few of the comments on the recipe said that it was really sweet. So I figured that if I had too much sweet potato it would turn out perfectly.
And they did. I don't have any pictures, but if you just imagine a pumpkin pie, it looks exactly the same. :)
In the future I think I will use 4 cups of mashed sweet potato for this exact recipe and plan on making two pies out of it. I also will increase the amount of spices a little bit.
It was so good! Every time I make sweet potato pie I say that I am never making pumpkin pie again!
Subscribe to:
Posts (Atom)