Here it is, my first fish dish post!
We have had this recipe several times already and it is SO good that I am going to create a 'done fish dish' tab above just so I have somewhere official to put this.
My brother-in-law and his wife turned us on to this salmon recipe, they said it was the best, and they were right. It hasn't failed us yet, and we usually manage to screw something up! (To give you an idea how good it is, in the four weeks that we have had fish once a week, three of the weeks were this recipe.)
We buy the wild salmon from the fish counter at the grocery store which allows us to pick exactly the amount we need for no leftovers, and the wild salmon is as fresh as we're going to get here in Colorado.
Salmon marinade:
(note: According to the recipe this is for 4 six ounce fillets, but my brother-in-law doubles the recipe when he makes 4 fillets. I have been making this exact recipe for the 1/2 lb of salmon we get.)
1/4 cup brown sugar
1/4 cup olive oil
1/4 cup soy sauce
2 teaspoons lemon pepper
1 teaspoon dried thyme
1 teaspoon dried basil
1 teaspoon dried parsley
1/2 teaspoon garlic powder
Whisk all ingredients together. Put salmon into plastic bag, pour marinade over it, seal and refrigerate for one hour. (We have done less time and it still turned out great.)
At this point I hand the bag and a cold beer to my research team (he says he can't grill without a beer...) who expertly and magically prepares the salmon on the grill. If you need instructions on this part, here is the link to the recipe. :)
Well now that I am publishing my fish dish of the week, I feel a little more motivated to make some different dishes... which is kind of scary. Wish me luck!!
Next time, more hidden veggies!
Sunday, April 29, 2012
Tuesday, April 24, 2012
Potato Salad
I'm baaaaack! Here are my excuses for not posting since December....
First it was the holiday season. The holidays are not a time for hidden veggies, they are a time for pigging out on delicious food made with butter. There has to be exceptions, and what better time than the holidays...am I right?
Then in January we found out we were expecting our second baby! This was promptly followed by me puking my guts out for months and therefore not cooking, eating, or spending any time anywhere that smelled remotely like food. (My poor research team was left fending for himself and our son... thankfully, they survived.)
Now it's the end of April and I am so happy to be back in the kitchen... this weekend I made my mom's chocolate chip cookies, then I made her coffee cake, oooh, I also made fresh salsa, we marinaded and grilled chicken one night, then red snapper the next night... it has been so good to EAT again!! So, I'm back.
I am going to add something to my hidden veggie blog. This year, before the puking, I made a New Year's resolution to have fish for dinner once a week. Since my research team and I don't eat much fish usually, every week will be an experiment. So along with new and improved hidden vegetable recipes, I will post our most successful (or maybe the biggest disaster...) fish recipes. Also, if anyone has any great family favorite fish, or any seafood dinners, I'd love to hear them!!
So onto my hidden veggie recipe of the week.... Potato Salad!
Here in Grand Junction it has started to feel like summer, and nothing says summer like grilling burgers and a good potato salad. So I googled "best potato salad" and went about butchering the recipe. :) Here is the original recipe if you are interested.
I basically halved the recipe and added my own little something.
Ingredients:
2.5 lbs red potatoes
1/4 small yellow onion, chopped
1 cup red pepper, chopped
3 hard boiled eggs, chopped
1 cup cauliflower puree (I should note that I made this puree with milk instead of water so that it would be creamier)
1/2 cup miracle whip
3 tbs cup mustard
2 tbs sweet pickle relish
bunch green onions
salt and pepper
garnish with paprika and green onions
Chop potatoes, boil until soft, cool. Mix all ingredients together, chill until meal time.
Here are some photos:


(Yes the pineapple on my mini burger is larger than the hamburger... what can I say.)
The verdict:
"Good enough to take to a potluck."
It wasn't as creamy as potato salad made with a gallon of mayo, it had a lighter feel to it, which I liked. I felt like it was a little bland, so since we have left overs I may add a little something more to it tonight and see the difference tomorrow.
On the plus side, there was no sign of the cauliflower at all, so this was a successful hidden veggie!
**I sprinkled dill and Worcestershire sauce and stirred them in, it sat overnight. The new verdict? It was better, but maybe just because all the flavors meshed better overnight? I think this recipe is pretty good, but I am going to experiment with it at least one more time before posting under in the 'done' recipe tag.**
Tuesday, December 6, 2011
Mac and Cheese
I know I said I would do veggie bread next, well... epic failure. So
bad, that I am not going to blog about it. No joke. I totally
butchered the recipe trying to make it healthier and well... not even
edible. So, moving on!
The good news is....I think I have done it. I think this may be as good as it is going to get for my mac and cheese. Wait until you see the picture! It looks just like homemade mac and cheese!
BUT first things first! Did you notice my two new tabs up above?!? That's right, 6 months later, I have started my "done" recipe pages! Right now there is only two recipes or so that I think are good enough to be considered "done" but hey - it's a start! Annnnd, I think this recipe will go over there also.
Cheese sauce ingredients:
1 cup cauliflower puree
1 cup shredded cheese
1 tsp yellow mustard
1/2 cup milk
Salt, pepper, garlic powder
Cook on medium-low stirring often until smooth.

Pour over macaroni noodles and LOOK, LOOK LOOK at how great it looks!!!

So you understand why I am so excited, you might need to look back at the pictures from my last mac and cheese attempt...
So, it wasn't super orange, but 1/2 cup cauliflower puree and 1/2 cup carrot would solve that problem. I do think it's important to puree the purees as smooth as possible. This was as smooth as I have ever made it, and there was still a tiny hint that something else was in there, but like I said, I think it's as good as it will get.
Also this recipe was barely enough for my research team and I, so... just so you know. :) Well, I guess D had some too, it was his first mac and cheese! See, train them young, and they'll never know mac and cheese isn't supposed to have pureed veggies! Hmm... I wonder if I should make him part of the research team?
The Verdict:
"It's so much creamier than last time! Is there more?"
Next time... maybe veggie bread? Maybe. Hopefully. I promise to try and follow the recipe... a little closer...
Wednesday, November 30, 2011
Mini Cheese Quiche
I have two confessions before I get started here.
First: It was all I could do not to title this blog Mini Cheesy Quichey.
Second: I ate four cookies just now. Which is an unacceptable amount of cookies to eat while making dinner! In case you missed it, check out these chocolate chip cookies with avocado for half the fat, which, really, doesn't make it any better that I just ate four of them right before dinner.
Anyway, normally when I make quiche I put lots of veggies in it that are not hidden at all... spinach, green peppers, tomatoes, or whatever we happen to have in the fridge. So it actually didn't occur to me to hide veggies in it until I saw a recipe for mini cheese quiches on a "kid friendly" menu. Ah ha! Now I can try and hide veggies in something that shouldn't have any.
I found a handful of recipes online, and this is what I came up with after looking at them. One interesting thing I read was to use bread as the "pie crust." Just roll it out before putting into the muffin pan. So, since I don't have any puff pastry or pie crust, I thought I'd give that a try.
I should also note that I used a jumbo cupcake pan. In the jumbo pan this recipe made 6 quiches, so it would probably make 12 in a normal size cupcake pan.
Ingredients:
6 bread slices rolled flat
4 eggs
1/2 cup cauliflower puree
1/2 cup squash puree (Note: you can use any white/yellow/orange puree combination that totals one cup)
1/4 cup milk
1 cup shredded cheese
Directions:
Preheat oven to 400. Roll bread slices flat and press/fold into cupcake pan. Press cheese into the bottom of the crusts.

Wisk together eggs and milk. Wisk in purees. Pour egg mixture into crusts.

Bake approximately 20 minutes or until set.

See how cheesy it looks? Mm mmm, and it smells like toast.
While I was finishing dinner, my research team served our 11 month old some bread with carrot fondue... I think this veggie thing is catching on! Even I haven't completely replaced cheese with veggies!

He also ate veggies hidden in quiche... sort of. Mostly he smashed it on the tray. But I have proof of at least one bite:

They turned out pretty yummy! I felt like I could taste the squash in them, but the research team couldn't taste the veggies at all. He knew there were veggies, but said it tasted like cheese quiche.
In the future I think will add some spices (I'm actually not sure why I didn't this time) ... salt, pepper, garlic and onion powder, but I think that is all I would change.
Also the bread-for-crust turned out really well! It wasn't quite as tasty as the biscuit recipe I use for my chicken pot pies, but it was good.
The Verdict:
"Fooled the baby!" (and the Daddy too...)
Next time... either veggie bread or brownies... the way I ate those cookies I'm thinking I should hold off on the brownies for a little while, even if they do have spinach in them! ;)
Saturday, November 26, 2011
Sweet Potato Pie
Happy Thanksgiving!
I was in charge of a few pies for Thanksgiving, and since my research team isn't a big fan of pumpkin pie (I know, I know, I don't know what is wrong with him either!) we made sweet potato pie instead. Which is HILARIOUS, because sweet potato pie tastes just like pumpkin pie. :) Moving on...
Actually, there are a few things about sweet potato pie that are better than pumpkin. For example, if you want to make it from the actual vegetable, and not from a can, sweet potatoes are much easier to deal with than pumpkin. No carving with a massive knife, no seeds, no stringies, no pumpkin splattered all over your computer... well, I suppose that could happen with sweet potato, it just hasn't happened to me... yet!
I've made sweet potato pie in the past and this is my favorite recipe so far.
I looked up a recipe on allrecipes.com and then also made some of the changes suggested in the comments. It turned out so good. Here is the recipe with the suggested additions/changes:
1 pound of sweet potatoes
1/2 cup butter
1/2 cup white sugar
1/2 cup brown sugar
1/2 cup milk
2 eggs
1/2 teaspoon nutmeg
1/2 teaspoon cinnimon
1/4 teaspoon ground ginger
1/4 teaspoon ground chives
1 teaspoon vanilla
1 tablespoon flour
1 pie crust
Well, I checked a few other recipes and found 2 cups of mashed sweet potatoes, and also 3 medium sweet potatoes. I happened to have 3 medium sweet potatoes, so that is what I boiled. But when I mashed them up it seemed like WAY more than 2 cups, so I didn't use it all. I didn't measure it though (of course...), which I really should have done considering that I ended up with two pies worth of sweet potato pie filling.
I was in charge of a few pies for Thanksgiving, and since my research team isn't a big fan of pumpkin pie (I know, I know, I don't know what is wrong with him either!) we made sweet potato pie instead. Which is HILARIOUS, because sweet potato pie tastes just like pumpkin pie. :) Moving on...
Actually, there are a few things about sweet potato pie that are better than pumpkin. For example, if you want to make it from the actual vegetable, and not from a can, sweet potatoes are much easier to deal with than pumpkin. No carving with a massive knife, no seeds, no stringies, no pumpkin splattered all over your computer... well, I suppose that could happen with sweet potato, it just hasn't happened to me... yet!
I've made sweet potato pie in the past and this is my favorite recipe so far.
I looked up a recipe on allrecipes.com and then also made some of the changes suggested in the comments. It turned out so good. Here is the recipe with the suggested additions/changes:
1 pound of sweet potatoes
1/2 cup butter
1/2 cup white sugar
1/2 cup brown sugar
1/2 cup milk
2 eggs
1/2 teaspoon nutmeg
1/2 teaspoon cinnimon
1/4 teaspoon ground ginger
1/4 teaspoon ground chives
1 teaspoon vanilla
1 tablespoon flour
1 pie crust
Directions
- Boil sweet potato whole in skin for 40 to 50 minutes, or until done. Run cold water over the sweet potato, and remove the skin.
- Break apart sweet potato in a bowl. Add butter, and mix well with mixer. Stir in sugar, milk, eggs, nutmeg, cinnamon and vanilla. Beat on medium speed until mixture is smooth. Pour filling into an unbaked pie crust.
- Bake at 350 degrees F (175 degrees C) for 55 to 60 minutes, or until knife inserted in center comes out clean. Pie will puff up like a souffle, and then will sink down as it cools.
I didn't quite follow the directions exactly (you know me!), but I wanted to put them up here for next time I need this recipe!
So, one of the funny things about this recipe is the 1 pound of potatoes requirement. I don't have a scale in my kitchen, do you? Am I the only one who doesn't, and if so, how did I miss that?
Well, I checked a few other recipes and found 2 cups of mashed sweet potatoes, and also 3 medium sweet potatoes. I happened to have 3 medium sweet potatoes, so that is what I boiled. But when I mashed them up it seemed like WAY more than 2 cups, so I didn't use it all. I didn't measure it though (of course...), which I really should have done considering that I ended up with two pies worth of sweet potato pie filling.
Anyways, I didn't want to wait 40-50 minutes for the potatoes to bake, so I peeled, cut up, and boiled them. Honestly, it probably still took 40 minutes... then I really did follow the recipe, I swear.
Like I said, I ended up with two pies, luckily I had two pre-made crusts in the freezer! I thought that it would turn out fine since a few of the comments on the recipe said that it was really sweet. So I figured that if I had too much sweet potato it would turn out perfectly.
And they did. I don't have any pictures, but if you just imagine a pumpkin pie, it looks exactly the same. :)
In the future I think I will use 4 cups of mashed sweet potato for this exact recipe and plan on making two pies out of it. I also will increase the amount of spices a little bit.
It was so good! Every time I make sweet potato pie I say that I am never making pumpkin pie again!
Sunday, November 20, 2011
Chocolate Chip Cookies
I eat healthy enough in my life that on the occasion when I am going
to eat dessert, it better be worth it. Butter, sugar, dark chocolate...
no substitutions, nothing fake, no holding back. So I have to admit
that I almost didn't want to make these cookies. I don't want to make
or eat cookies that are only kinda good. But, for the blog, I figured
I'd try it out.
I heard that avocado can be substituted for butter, so I looked up a few recipes. I ended up on The Hill Country Cook and basically followed her recipe. (If you go to her page, be warned, she used green m&m's so that's what the chunks of green are in her cookies, not avocado! :))
So I had this great plan to have these cookies ready for my research team as a welcome home surprise after he had been gone for a few days, (two surprises: surprise, cookies! and surprise, hidden avocado!) but when I opened the avocado, this is what I found:

It's weird because the skin was hard, so it didn't feel too soft. I had three avocados, so I figured one of them would be good... but no, they all looked like that! What the heck!?!? I was super bummed, especially since I had already started mixing ingredients. Ugh, and avocados are expensive! :( Well, I figured I'd just make a batch with no avocado, and then I would have a direct comparison when I did make them with avocado.
One week later... we had 3 new avocados.... but this time I checked the avocado before I mixed ingredients!

Phew! Much better. And so far, of the three new avocados, two have been beautiful. (Plus BONUS! these were on sale!)
So now I can continue:
1/2 cup butter, softened
1/2 cup avocado (1 small avocado)
3/4 cups white sugar
3/4 cups packed brown sugar
2 eggs
2 teaspoons vanilla
2 1/4 cups flour
1 teaspoon baking soda
1 teaspoon baking powder
1/2 teaspoon salt
1 cup chopped walnuts (optional)
dark chocolate chips
Combine dry ingredients, set aside. Cream together avocado, butter, and sugars. Here is what it looked like:

It's hard to tell in the picture, but it is just a little green. But more worrisome was that I could taste the avocado... hmmm. Add eggs and vanilla, one at a time, mixing well after each addition.

Then add dry mixture one cup at a time. Add nuts and chocolate chips. After adding the flour, we could STILL taste the avocado. I felt more and more nervous that this whole batch was going to be a waste.
The recipe said to roll spoonfuls of dough into balls and flatten slightly. Well, my dough was pretty sticky, so I sorta spooned the dough onto the baking sheets and tried to flatten it a little. (Which after a batch of those, I pulled the flour back out and rolled them into balls and flattened them, to see how that turned out...) Bake at 350 degrees for 11 minutes.
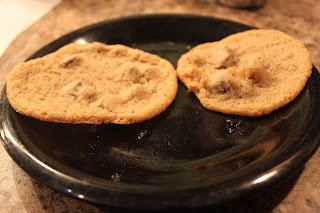
Here's how they came out before I was rolling and flattening them, and then also a picture after I rolled and flattened them:


I actually like the non-rolled ones better, but I am weird like that. More importantly they were not green at all, no sign of the avocado. Also, and this was shocking to me... no sign of the avocado in the taste either! None. I was shocked.

So beautiful. So in terms of comparing the cookies to the batch with no avocado (and 1 cup of butter, that is the only difference in the recipe)... this is how those came out:
They, of course, taste great, but are obviously much flatter. It's funny because I like my cookies fluffier and WOW does the avocado solve the flat cookie problem!
I feel like I am still in shock about how well they turned out. No joke, I think I am always going to make my cookies like this from now on!
The Verdict:
"Also great for breakfast!"
(Hee hee, he is not joking, we really did each have a cookie before breakfast...)
I heard that avocado can be substituted for butter, so I looked up a few recipes. I ended up on The Hill Country Cook and basically followed her recipe. (If you go to her page, be warned, she used green m&m's so that's what the chunks of green are in her cookies, not avocado! :))
So I had this great plan to have these cookies ready for my research team as a welcome home surprise after he had been gone for a few days, (two surprises: surprise, cookies! and surprise, hidden avocado!) but when I opened the avocado, this is what I found:

It's weird because the skin was hard, so it didn't feel too soft. I had three avocados, so I figured one of them would be good... but no, they all looked like that! What the heck!?!? I was super bummed, especially since I had already started mixing ingredients. Ugh, and avocados are expensive! :( Well, I figured I'd just make a batch with no avocado, and then I would have a direct comparison when I did make them with avocado.
One week later... we had 3 new avocados.... but this time I checked the avocado before I mixed ingredients!

Phew! Much better. And so far, of the three new avocados, two have been beautiful. (Plus BONUS! these were on sale!)
So now I can continue:
1/2 cup butter, softened
1/2 cup avocado (1 small avocado)
3/4 cups white sugar
3/4 cups packed brown sugar
2 eggs
2 teaspoons vanilla
2 1/4 cups flour
1 teaspoon baking soda
1 teaspoon baking powder
1/2 teaspoon salt
1 cup chopped walnuts (optional)
dark chocolate chips
Combine dry ingredients, set aside. Cream together avocado, butter, and sugars. Here is what it looked like:

It's hard to tell in the picture, but it is just a little green. But more worrisome was that I could taste the avocado... hmmm. Add eggs and vanilla, one at a time, mixing well after each addition.

Then add dry mixture one cup at a time. Add nuts and chocolate chips. After adding the flour, we could STILL taste the avocado. I felt more and more nervous that this whole batch was going to be a waste.
The recipe said to roll spoonfuls of dough into balls and flatten slightly. Well, my dough was pretty sticky, so I sorta spooned the dough onto the baking sheets and tried to flatten it a little. (Which after a batch of those, I pulled the flour back out and rolled them into balls and flattened them, to see how that turned out...) Bake at 350 degrees for 11 minutes.
Here's how they came out before I was rolling and flattening them, and then also a picture after I rolled and flattened them:


I actually like the non-rolled ones better, but I am weird like that. More importantly they were not green at all, no sign of the avocado. Also, and this was shocking to me... no sign of the avocado in the taste either! None. I was shocked.

So beautiful. So in terms of comparing the cookies to the batch with no avocado (and 1 cup of butter, that is the only difference in the recipe)... this is how those came out:

They, of course, taste great, but are obviously much flatter. It's funny because I like my cookies fluffier and WOW does the avocado solve the flat cookie problem!
I feel like I am still in shock about how well they turned out. No joke, I think I am always going to make my cookies like this from now on!
The Verdict:
"Also great for breakfast!"
(Hee hee, he is not joking, we really did each have a cookie before breakfast...)
Tuesday, November 8, 2011
Chicken Pot Pies
We don't have pot pies VERY often, but it is definitely one of our favs.
I am honestly not sure how to make a real pot pie, but I invented this recipe and to this day it is one of my proudest accomplishments. (It's actually not the pot pie itself that is so good, it's the biscuit recipe I use for the crust that is so good...)
So I thought it was about time I hide some veggies in it. And it's zucchini season, so that's what I used. This time I didn't puree it, I just finely shredded it, just like I would for zucchini bread. (In truth, it would probably be much easier to hide cauliflower or white pumpkin, but like I said, it's zucchini season!)
Here we go!
I mixed together:
2 cups cooked frozen veggies (carrot, pea, corn, green bean combo... but choose your favorite)
1 cup finely shredded zucchini
1/2 can cream of chicken soup
1 cup cooked chopped chicken (I only make pot pies when I have left over chicken)
dash of black pepper, basil

Then I make this recipe from Recipes for Moms. It's a baking soda biscuit recipe, it's easy, and the biscuits are so so good. So for pot pies I roll it out to 1/4 inch or so, and cut it into circles with a bowl:


In to the cupcake pan they go (this is a jumbo cupcake pan, also called muffin size - these are the pans I used to make the cupcakes for my sister-in-laws wedding), and I stuff them full with the veggies and chicken.

I fold over the edge and use the leftover dough to fill in the tops.

The biscuit recipe says to bake at 450 for 10-12 minutes, I usually do 12 for the pot pies.

Oh these make me so happy! They smell so good...
Here is a picture of the finished product:

To be honest, I was disappointed. You can see the water? I should have pressed all the water out of the shredded zucchini really well, but I didn't. I guess I didn't realize how much there would be. So the bottoms were soggy. :(
On the plus side, they tasted great! The middle was a little greener than normal, but I don't think anyone would have asked.
The Verdict:
"Tastes like delicious pot pie!"
So in the future, I'm going to really press out all the liquid from the zucchini... or I'll just use the good ole standby... pureed cauliflower. Or maybe, just maybe, this really great recipe will have to go without hidden veggies. ;) Ha, just joking, I can't help but hide veggies... next time I'll probably just screw it up with a different veggie!
Subscribe to:
Posts (Atom)